Greenhouse Plastic: A Cost Effective Cover

Introduction to Greenhouse Plastic
In the world of gardening, a greenhouse serves as a haven for plants, offering a controlled environment that fosters growth even in the most challenging seasons. The choice of greenhouse material plays a pivotal role in determining the success of your gardening venture. Among the various options available, greenhouse plastic stands out as a cost-effective, popular and versatile choice. Let’s delve into the world of greenhouse plastic, discussing its pros and cons, comparing it with other materials, installation, ventilation, and various considerations for cultivating a thriving greenhouse garden.
Pros and Cons of Greenhouse Plastic Sheeting
Greenhouse plastic offers a host of advantages that make it a preferred choice for many gardeners. Its cost-effectiveness, lightweight nature, and built-in UV protection make it an enticing option for both beginners and experienced horticulturists. The ease of installation and availability in various sizes add to its appeal. However, it’s essential to acknowledge its limitations. Plastic sheeting, although budget-friendly, might lack the durability of other materials. The continuous exposure to sunlight can lead to degradation over time, requiring periodic replacements.
Comparison with Glass and Polycarbonate Panels
While plastic sheeting has its merits, it’s worth considering alternatives like glass and polycarbonate panels. Glass, with its exceptional durability and timeless aesthetics, is an ideal choice for long-term greenhouse structures. It allows ample sunlight to penetrate while offering excellent insulation. On the other hand, polycarbonate panels strike a balance between durability and insulation. These panels provide better insulation than glass and are shatter-resistant, making them a safer option.
DIY Installation of Greenhouse Plastic: One Example
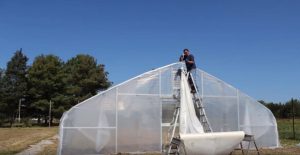
Installing greenhouse plastic might seem like a daunting task, but with a little guidance, you’ll have your greenhouse covered and ready to nurture your plants in no time. There are different ways to achieve a taut, attractive greenhouse. What follows is just one of many, and the connectors are spring wire. In this example, the end walls are done separately. Here’s a simple step-by-step process to help you get it right:
Step 1: Measure
Before you begin, measure the dimensions of your greenhouse frame. You’ll want to get the right size of plastic to ensure a snug fit. Here’s how to calculate that:
- To measure the width of the plastic, face the front of the greenhouse and measure from the bottom horizontal rail on one side to the bottom horizontal rail on the other side. You are measuring the arc of the structure. We’ll call that measurement “X”.
- Now add 4 feet to that measurement.
- Measure the length of the greenhouse. We’ll call that “A”.
- Measure the height from the ground to the top. We’ll call that “B”. You have to multiply that by 2 to cover the front and back of the greenhouse.
- Calculate A+2(B), then add 8 feet
- So if X=20 feet, the width of the plastic should be 24 feet. If the length of the greenhouse (A) is 24 feet, and the height (B) is 8 feet, then you will need:
- 24+2(8)+8=48 feet
Step 2: Prepare the Greenhouse Plastic
If your plastic is on a roll, leave it on the roll for easier installation. You can cut it later. Make sure your cutting tools are sharp to ensure clean edges.
Begin the installation process by positioning yourself at one end of the greenhouse. Pull plastic off the roll. Gather the outside edges toward the center. Then tie a long piece of rope or strong cord around the wad of plastic that you created. You’ll be pulling on this, so make sure it’s snug. If you’re working with a helper, this is the time to have them get in position where they can pull the plastic across the top of the greenhouse.
Step 3: Pull the Plastic Across the Greenhouse
Run the rope lengthwise the top of the greenhouse, then have one person pull the plastic along the length while the other one feeds it smoothly off the roll. As the plastic is pulled across the top, it will begin to unfold. Pull the plastic far enough beyond the greenhouse length, then cut the plastic free from the roll.
Step 4: Secure the Plastic and Drop the Sides
Pull the plastic taut across the top (lengthwise) of the greenhouse, and secure it with spring wire at each end. Make sure it’s centered and even before proceeding. One person should stay at the top while the other unfolds the plastic down one side. Then repeat on the other side. Temporarily secure the plastic to the ends of the hip rail on each side using spring wire.
Step 5: Attach the Plastic Beginning from the Top
Have one person on each end at the top. Begin stretching and securing the plastic down one side toward the hip rail. When you get down to the hip rail, stretch the plastic from the middle out to the ends. Secure with spring wire.
Step 6: Trim Excess Plastic
With the plastic securely attached, you can now trim the excess hanging down the sides of the frame. Leave a few extra inches to ensure a proper overlap, which will help keep the interior of the greenhouse sealed and protected.
Step 7: Secure the Bottom
Finally, secure the bottom of the plastic to the base of the greenhouse frame. This ensures that the plastic remains in place during windy conditions. Use clips or batten tape to anchor the plastic along the base, keeping it tight and secure.
Step 8: Inspect and Adjust
Once everything is in place, take a step back and inspect your work. Check for any loose areas, wrinkles, or uneven tension. Make any necessary adjustments to ensure the plastic is tight and smooth across the entire frame.
If this seems clear as mud to you, check out instructions with pictures here.
This is just one way to attach plastic to a greenhouse. The attachment system you use will depend on what your frame is made of. Other attachment methods include batten tape, PVC clamps, fixed film clips, rope, and even DIY clamps made from garden hose.
Ventilation and Heating Considerations
Ventilation is a cornerstone of successful greenhouse gardening. Adequate air circulation prevents heat buildup, reduces humidity-related diseases, prevents condensation, and promotes strong plant growth. Consider natural ventilation through vents and louvers, as well as powered exhaust fans for larger structures. Additionally, implementing proper heating mechanisms , such as radiant heaters or geothermal systems, guarantees consistent temperatures conducive to plant development.
Double Wall Inflation Greenhouses
For those seeking advanced insulation, double wall inflation technology offers an innovative solution. This design involves two layers of plastic with a small pocket of air in between. The air pocket acts as an insulator, minimizing heat loss during colder months and reducing excessive heat during summers. It also sheds snow better in the winter. This technology significantly enhances energy efficiency, making it an environmentally conscious choice. Double walled greenhouse sheeting requires a blower and louvers to be installed.
Choosing the Right Greenhouse Plastic
The success of your greenhouse largely depends on selecting the right type of plastic sheeting. Consider factors such as thickness, UV protection, light diffusion, and condensation resistance. Acceptable greenhouse plastics range from 6 to 12 mm in thickness. Thicker plastics offer greater durability and insulation and increase light diffusion, although they allow for less light penetration. UV-protected options shield plants from harmful rays. Light diffusion properties of the plastic ensure even distribution of light, preventing scorching and encouraging uniform growth. If you want maximum light penetration go with clear plastic. Thicker films are typically translucent.
You can buy a 12 ft x 25 ft piece of 6 mm, clear plastic for about $50. The price goes up to about $100 or more for a 12 mm piece of the same dimension.
Maintenance and Longevity
Ensuring the longevity of your greenhouse plastic involves routine maintenance. Regularly inspect the plastic for signs of wear, tear, or degradation. Clean the surface to remove dirt and debris that might hinder light transmission. Secure any loose areas promptly to prevent wind damage. With proper care, greenhouse plastic can provide several growing seasons of optimal performance.
Maximizing Light Efficiency
Optimizing light transmission through greenhouse plastic is vital for plant growth. Certain plastics have light diffusion properties that scatter incoming sunlight, reducing the risk of sunburn while promoting even illumination. You can regulate light penetration by adding shade cloth to your greenhouse or through your selection of greenhouse plastic. By maximizing light efficiency, you provide your plants with the energy they need for photosynthesis and healthy development.
Managing Condensation and Humidity
Condensation can be a concern within greenhouses, potentially leading to mold and disease issues. To manage this, ensure proper ventilation to maintain airflow and minimize excess humidity. Consider installing drip irrigation systems to maintain consistent moisture levels without causing excessive condensation. Monitoring humidity levels helps create a favorable environment for plant growth.
Conclusion
In the realm of greenhouse gardening, plastic sheeting emerges as a pragmatic choice. Its affordability, lightweight nature, and UV protection make it an accessible option for gardeners of all levels. However, it’s essential to weigh the advantages against the disadvantages and explore alternatives like glass and polycarbonate panels for specific needs. By understanding proper installation techniques, ventilation requirements, and environmental considerations, you can harness the potential of greenhouse plastic to nurture thriving gardens throughout the seasons.
FAQs
Is greenhouse plastic UV-resistant?
Yes, many greenhouse plastic sheets are designed with UV protection to shield plants from harmful rays, preventing damage and promoting healthy growth.
What is the lifespan of greenhouse plastic?
The lifespan varies based on factors like quality, thickness, and exposure to elements. On average, greenhouse plastic can last 2 to 5 years with proper care.
Can I install greenhouse plastic myself?
Absolutely! DIY installation is feasible with some basic tools and guidelines. Proper tension and securing methods are crucial for optimal results. It helps a lot if you have two people working on installation.
What’s the advantage of double wall inflation technology?
Double wall inflation technology offers superior insulation, maintaining consistent temperatures for plants. This can result in energy savings and extended growing seasons. In northern climates, a double wall greenhouse sheds snow better.
How can I reduce condensation in my greenhouse?
Ensuring proper ventilation and airflow helps manage condensation. Using drip irrigation and maintaining balanced humidity levels also contribute to reducing excess moisture.
In conclusion, greenhouse plastic holds immense potential as a glaze for cultivating thriving gardens year-round. While it presents advantages like affordability and UV protection, it’s important to be mindful of its limitations and environmental impact. By making informed decisions about installation, ventilation, and maintenance, gardeners can harness the benefits of greenhouse plastic while nurturing healthy and vibrant plant life. Whether you’re a seasoned gardener or just starting, understanding the nuances of using greenhouse plastic empowers you to create a flourishing oasis within your own backyard.


